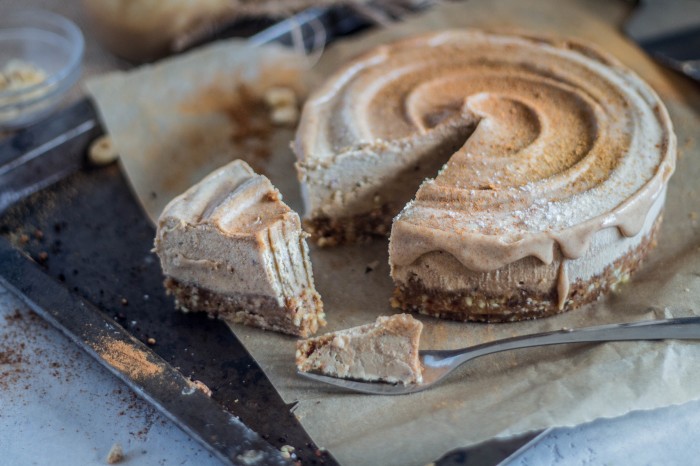
Cinnabun Apple Cheesecake with Salted Caramel
Oh my, this is something you've gotta try! This salted caramel covered cheesecake is on another level.
Serves 8-10 | Prep time: 30 mins + setting time | Cooking time: 0 mins
INGREDIENTS
Base
- 1 cup skinless almonds
- 1/2 cup oat flakes
- 10 medjool dates (pitted)
- 1/4 tsp Himalayan pink salt
- 1 Tbsp almond butter
- 1/4 tsp cinnamon
Caramel
- 8 medjool dates (pitted)
- 1/2 cup cashew milk (or other plant milk)
- 2 Tbsp cashew butter
- 1/4 tsp Himalayan pink salt
Filling
- 2 cups cashews (soaked for 6 hours and rinsed)
- 1/2 cup maple syrup
- Juice of 1/2 a lemon
- 1/2 tsp cinnamon
- 1 tsp vanilla powder
- 1 red apple (without core)
- 1/3 cup coconut oil (melted)
Garnish
- 2 Tbsp coconut oil
- 1 tsp coconut water
- 3 Tbsp of the caramel mixture (held aside once prepared)
METHOD
- To make the base add the almonds and oat flakes to a food processor and blitz until they are finely ground.
- Add the remaining ingredients for the base and continue to blitz until all the ingredients are broken down into a crumb. The mixture should press together like a dough between your fingers.
- Press the dough into the bottom of your cake tin. Pack it down firmly and set aside in the fridge.
- To make the caramel, add all the ingredients to your blender or high speed food processor. I find that using a nutri-bullet or ninja-bullet for this part works best as it takes less time to blend into a smooth consistency. Make sure that there are no lumps and the caramel is creamy. Separate 3-4 tablespoons of the caramel into a jar or bowl, cover and set this aside in the fridge. This will be used later for the caramel glaze.
- To prepare the filling, add the cashews, maple syrup, lemon juice, mixed spice, cinnamon and vanilla to your blender. Blend until they are smooth.
- Add the chopped apple and continue to blend until the mixture is completely smooth and creamy.
- Lastly add in the melted coconut oil, and blend further for 30 seconds to incorporate the oil into the mixture.
- Pour the filling into a large bowl.
- Add the caramel to the bowl and gently fold it through the filling using a spatula. You don’t want to over mix here as the goal is to have a nice marble effect of caramel throughout the cheesecake.
- Pour the mixture on top of the cake base. Using your spatula, make a large swirl print on top of the cake by holding the spatula at the outer edge of the cake and working your way into the middle whilst spinning the cheesecake tin.
- Place the cake in the freezer to set for at least 6 hours or preferably overnight.
- Remove the cake from the tin and sit it on a drip tray.
- To prepare the glaze, place the coconut oil, coconut water and remaining caramel mixture in a bowl and heat them over a saucepan of simmering water. Stir constantly until everything is melted together. If you find the mixture is too thick, add another tsp of coconut water until you reach the desired consistency.
- Use a spoon or piping bottle to drip the caramel glaze around the edges of the cake. Dust the cake with a little bit of cinnamon if you wish.
- This cake can be enjoyed either semi-frozen or defrosted. I prefer it completely soft as it has a mousse like texture. Allow at least an hour for defrosting before serving to reach this consistency. Store in the fridge in an airtight container for up to five days, or freeze.
Have you made this recipe?
Share a photo and tag us - @veganeasy — we can't wait to see it!
DessertChristmasHolidayRawSugar Free
Print Recipe

There is a misconception that veganism is difficult or restrictive; I used to feel that way as well before I researched the lifestyle. My aim with the blog is to give people the tools they need to create delicious vegan food that they can share with their friends, work colleagues and family. See all recipes by Christina